Setting Up a Raspberry Pi 3 with Docker
In a previous post I set up docker on a Raspberry Pi running Photon OS. Later I realised Photon OS was not practical for me for the project I was running. Thus I changed to Raspbian Buster Light instead.
I will now redo a similar setup.
Table of Contents:
Preparing SD Card
Start by download Raspbian for Raspberry Pi. This can by downloaded at the Raspbian site.
I am using the following image:
File: 2020-02-13-raspbian-buster-lite.zip
Size: 433M
CRC-32: 0061e5fe
SHA-1: 7aeaec17941fee1bb733d013367eebd43d2e3deb
SHA-256: 12ae6e17bf95b6ba83beca61e7394e7411b45eba7e6a520f434b0748ea7370e8
Install balenaEtcher if not already installed.
Although Etcher can ingest .zip files, i prefer to extract the .zip archive so I only have the .img file.
Install the .img file using balenaEtcher.
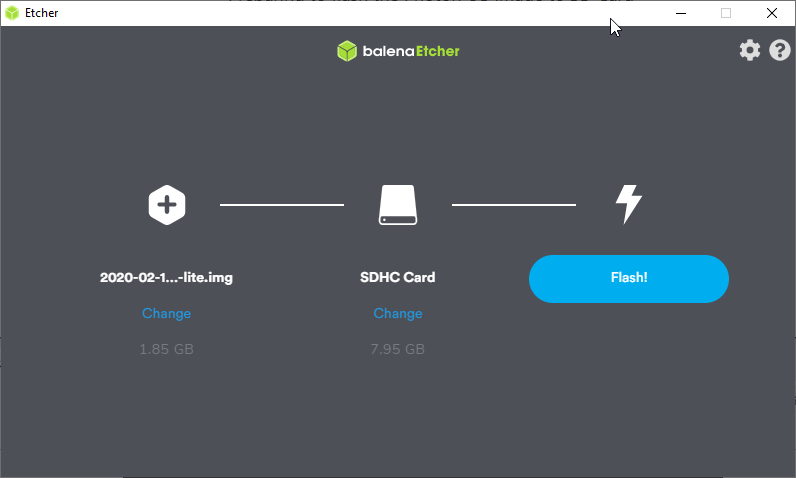
Preparing to flash the Raspbian Buster Lite image to SD Card
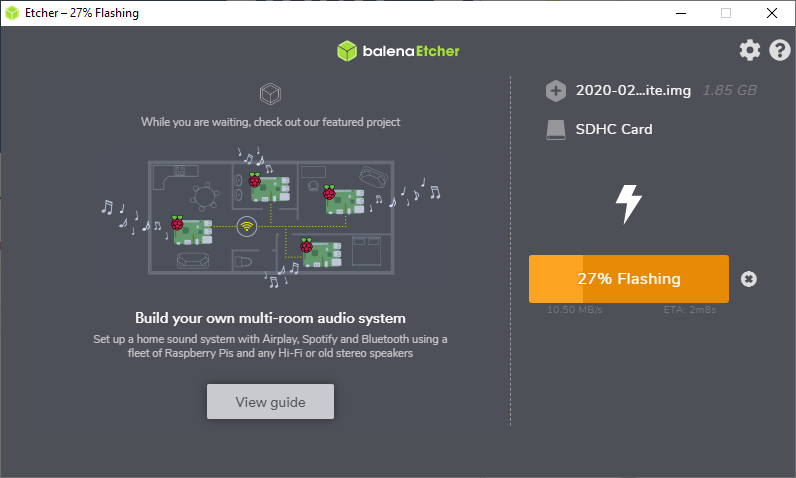
Flashing the SD Card
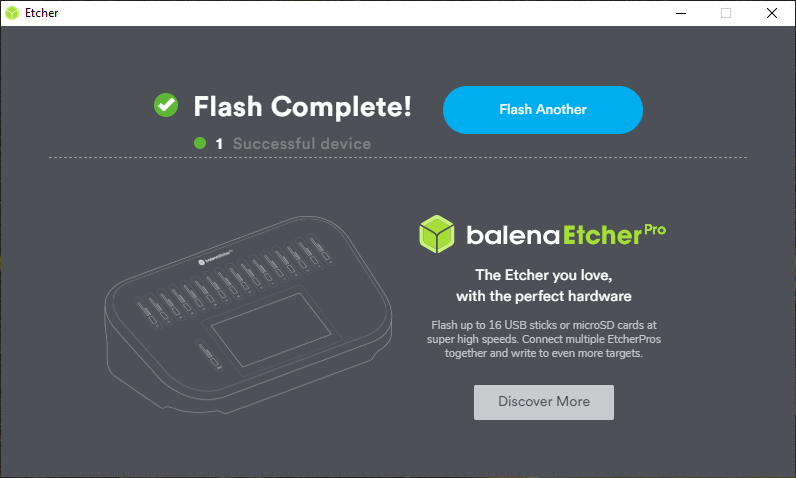
SD Card prepared
Setting up Wi-Fi and SSH
I will be running this Pi in so called headless mode, that is without any mouse/keyboard nor any display connected to the Pi. This means I need to ensure the Pi can connect to the wireless network, as well as I can connect to the Pi over SSH.
Update 2024-08-01: This process has changed since Debian 12 Bookworm, the best way is to use the Raspberry Pi imager.
Setting up Wi-Fi
In the boot volume, create a new file with the name wpa_supplicant.conf and the following contents (the country code should be in ISO 3166-1 ALPHA-2 format (e.g. “SE”)):
ctrl_interface=DIR=/var/run/wpa_supplicant GROUP=netdev
update_config=1
country=<Insert country code here>

network={
 ssid="<Name of your WiFi>"
 psk="<Password for your WiFi>"
}
Setting up SSH
To enable SSH, add an empty file with the name ssh (note the lack of file extension) in the boot volume
Setting up Pi
First boot
Insert the SD card into the Raspberry Pi and insert power cable, and wait for the Pi to boot up.
We now need to find the IP to the Pi. This can either be done using your router interface, but I prefer to use NMAP for Windows:
C:\Users\Arnav>nmap -sP 192.168.8.0/24
Starting Nmap 7.80 ( https://nmap.org ) at 2020-02-23 12:00 W. Europe Standard Time
/***/
Nmap scan report for raspberrypi.jain.lan (192.168.8.224)
Host is up (0.26s latency).
MAC Address: B8:27:EB:7B:6E:B6 (Raspberry Pi Foundation)
/***/
Nmap done: 256 IP addresses (15 hosts up) scanned in 7.21 seconds

C:\Users\Arnav>
Connect to Pi
Connect to Pi using ssh and change password on first connection. Default logon is pi / raspberry.
ssh pi@192.168.8.224
When connecting for the first time, you will be asked to verify the fingerprint of the server, type yes. Then when asked for the password, type raspberry.
Change of admin password
First thing to do is to change the password for the user ‘pi’ using the passwd command.
passwd
First enter the current password (raspberry), and then type the new password two times.
pi@raspberrypi:~ $ passwd
Changing password for pi.
Current password:
New password:
Retype new password:
passwd: password updated successfully
pi@raspberrypi:~ $
Change of hostname
To check to current hostname you can use the hostname command:
hostname
pi@raspberrypi:~ $ hostname
raspberrypi
pi@raspberrypi:~ $
To change the hostname we have to change it in two places: /etc/hostname and /etc/hosts.
sudo nano /etc/hostname
This file contains only one line - the name of your Raspberry Pi. Change the name to whatever you like, but only use the letters ‘a’ to ‘z’ (uppercase or lowercase), digits ‘0’ to ‘9’, and the dash ’-’.
Save the file using Ctrl+x, then Y followed by Enter.
sudo nano /etc/hosts
Find the line starting with 127.0.0.1, and change the name following it to your new hostname. Save the file using Ctrl+x, then Y followed by Enter.
Finally, reboot device.
sudo reboot
pi@raspberrypi:~ $ sudo reboot
Connection to 192.168.8.224 closed by remote host.
Connection to 192.168.8.224 closed.
Enable passwordless SSH access
See post Accessing Linux Web Servers Using SSH Keys
Generic housekeeping
Update the APT package repository cache of Raspbian using the following command:
sudo apt update
Now that the Pi have knowledge of latest versions of each software package, lets update them using the following command:
sudo apt upgrade
When asked for confirmation, type y.
Final action is to install the kernel headers.
sudo apt install raspberrypi-kernel raspberrypi-kernel-headers
Installing Docker
Installing Docker on raspbian is really easy using the the convenience script supplied by Docker
curl -fsSL https://get.docker.com -o get-docker.sh
sudo sh get-docker.sh
To enable management of docker without having to use the sudo command every time, add the pi user to the docker group.
sudo usermod -aG docker pi
Testing the docker installation
docker pull hello-world
docker run --rm hello-world
pi@ha-bridge:~ $ docker pull hello-world
Using default tag: latest
latest: Pulling from library/hello-world
4ee5c797bcd7: Pull complete                                                                                             Digest: sha256:fc6a51919cfeb2e6763f62b6d9e8815acbf7cd2e476ea353743570610737b752
Status: Downloaded newer image for hello-world:latest
docker.io/library/hello-world:latest
pi@ha-bridge:~ $ docker run --rm hello-world

Hello from Docker!
This message shows that your installation appears to be working correctly.

To generate this message, Docker took the following steps:
 1. The Docker client contacted the Docker daemon.
 2. The Docker daemon pulled the "hello-world" image from the Docker Hub.
    (arm32v7)
 3. The Docker daemon created a new container from that image which runs the
    executable that produces the output you are currently reading.
 4. The Docker daemon streamed that output to the Docker client, which sent it
    to your terminal.

To try something more ambitious, you can run an Ubuntu container with:
 $ docker run -it ubuntu bash

Share images, automate workflows, and more with a free Docker ID:
 https://hub.docker.com/

For more examples and ideas, visit:
 https://docs.docker.com/get-started/

pi@ha-bridge:~ $
Installing Portainer
To manage docker from the webbrowser i use Portainer.
docker volume create portainer_data
docker run -d -p 8000:8000 -p 9000:9000 --name=portainer --restart=always -v /var/run/docker.sock:/var/run/docker.sock -v portainer_data:/data portainer/portainer
Updates
2021-01-10: Section Setting up Wi-Fi has been updated to clarify that it should be ISO_3166-1 ALPHA-2 codes.