Exposing a Webserver Using Cloudflare Tunnel
As part of some migrations I wanted to in part remove VPN requirement and in part use Cloudflare for authentication. I will be using Cloudflare Tunnel combined with Cloudflare Access1. We will start by setting up an simple nginx server, expose it to the web using Cloudflare Tunnel, and finally add authentication in front using Cloudflare Access1.
Table of Contents
Pre-requisites
- Having an environment with docker
- Following docker images will be used:
- Having a domain name setup with Cloudflare
Setting up a webserver
A simple nginx webserver can be up and running using the following command:
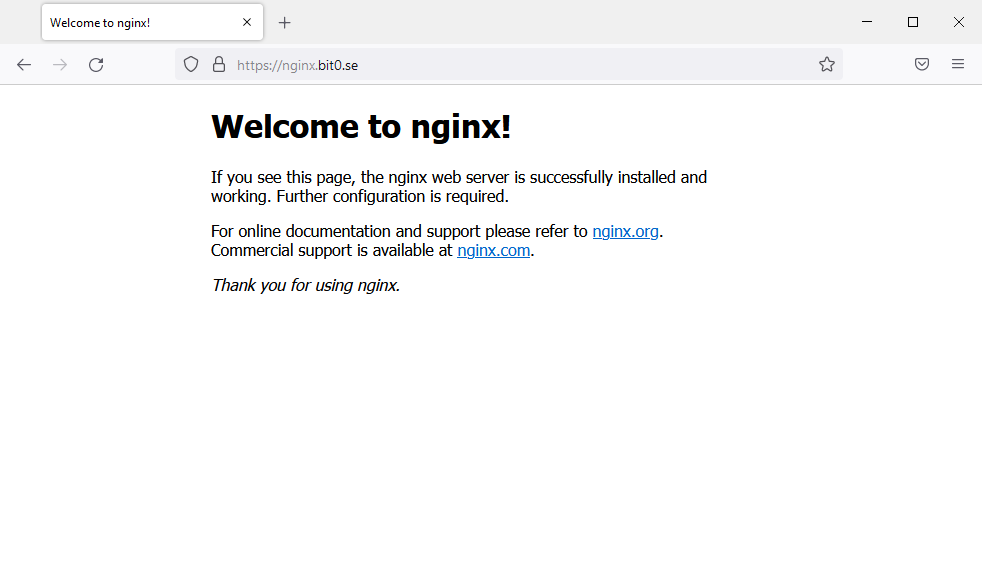
docker run --rm -p 8888:80 nginxNavigate to http://localhost:8888/ to ensure the webserver is running and is able to serve data.

Setting upp Cloudflare Tunnel
Using Cloudflare Tunnel we will now expose the previously created webserver to the domain https://nginx.bit0.se/
My working folder for mounting the docker volume will be W:\cf.
Authorising the Cloudflare daemon
We start of by authorising the container access to manage the Cloudflare domain (i.e. giving api access for domain):
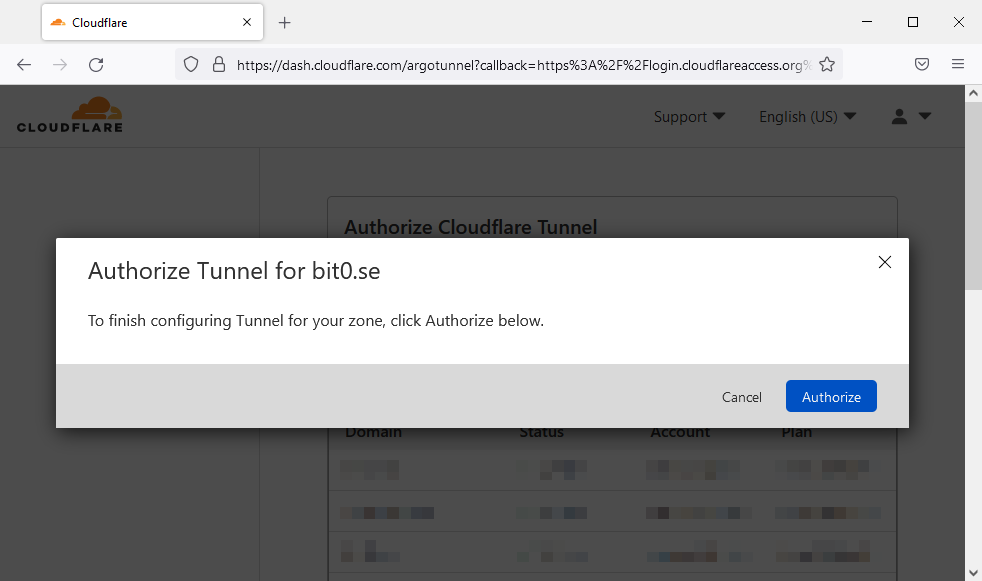
docker run --rm -it -v \workingfolder:/home/nonroot/.cloudflared cloudflare/cloudflared:2022.1.0 tunnel loginThis will show a link. Open the link in your web browser, sign into your Cloudflare dashboard, and select the domain you wish to use. In my case the selected domain will be bit0.se. A popup will show confirming the authorization, select Authorize.
> docker run --rm -it -v W:\cf:/home/nonroot/.cloudflared cloudflare/cloudflared:2022.1.0 tunnel login
Please open the following URL and log in with your Cloudflare account:

https://dash.cloudflare.com/argotunnel?callback=https%3A%2F%2Flogin.cloudflareaccess.org%2F4tpxSBnxxxxxxxxxyLr_xCKxxxxxxxxxxxxxxxxxxxJhE%3D

Leave cloudflared running to download the cert automatically.
2022-01-30T11:28:02Z INF Waiting for login...
You have successfully logged in.
If you wish to copy your credentials to a server, they have been saved to:
/home/nonroot/.cloudflared/cert.pem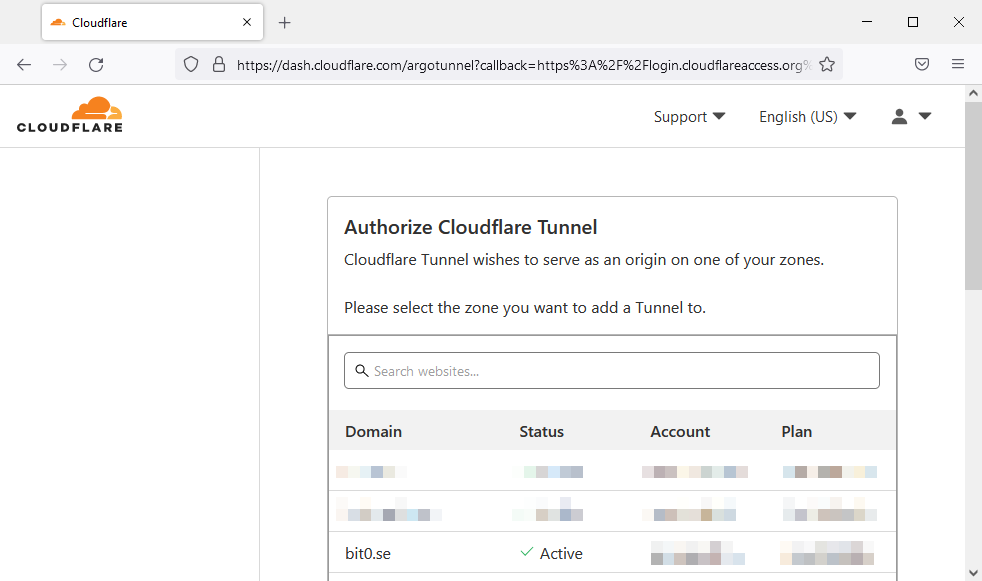

Creating the tunnel
Next step is to create the tunnel and give it its’ name2:
docker run --rm -it -v \workingfolder:/home/nonroot/.cloudflared cloudflare/cloudflared:2022.1.0 tunnel create <name>> docker run --rm -it -v W:\cf:/home/nonroot/.cloudflared cloudflare/cloudflared:2022.1.0 tunnel create example
Tunnel credentials written to /home/nonroot/.cloudflared/8f2330b4-e661-4ce2-a290-f5b57970fa02.json. cloudflared chose this file based on where your origin certificate was found. Keep this file secret. To revoke these credentials, delete the tunnel.
Created tunnel example with id 8f2330b4-e661-4ce2-a290-f5b57970fa02Note the id3 of the tunnel above, as this will be used later to configure the tunnel.
If we have multiple tunnels, we can also list available tunnels:
docker run --rm -it -v \workingfolder:/home/nonroot/.cloudflared cloudflare/cloudflared:2022.1.0 tunnel listConfiguring the tunnel
Next step is to create a tunnel configuration file. The documentation for the configuration can be found here. In our case the config.yaml looks like the following:
tunnel: 8f2330b4-e661-4ce2-a290-f5b57970fa02
credentials-file: /home/nonroot/.cloudflared/8f2330b4-e661-4ce2-a290-f5b57970fa02.json

ingress:
  - hostname: nginx.bit0.se
    service: http://jain10.jain.lan:8888
  - service: http_status:404
Setting up DNS records
We also need to setup DNS records for the tunnel. This can be done manually or automatically using the cloudflared service.
docker run --rm -it -v \workingfolder:/home/nonroot/.cloudflared cloudflare/cloudflared:2022.1.0 tunnel route dns <name> <hostname>In our case it looks like this:
> docker run --rm -it -v W:\cf:/home/nonroot/.cloudflared cloudflare/cloudflared:2022.1.0 tunnel route dns example nginx.bit0.se
2022-01-30T11:56:58Z INF Added CNAME nginx.bit0.se which will route to this tunnel tunnelID=8f2330b4-e661-4ce2-a290-f5b57970fa02
If we were to add this DNS record manually, it looks like this:
Type: CNAME
Name: HOSTNAME
Target: <id>.cfargotunnel.com
Proxy status: Proxied
TTL: Auto
In our case it looks like the following:
Type: CNAME
Name: nginx
Target: 8f2330b4-e661-4ce2-a290-f5b57970fa02.cfargotunnel.com
Proxy status: Proxied
TTL: Auto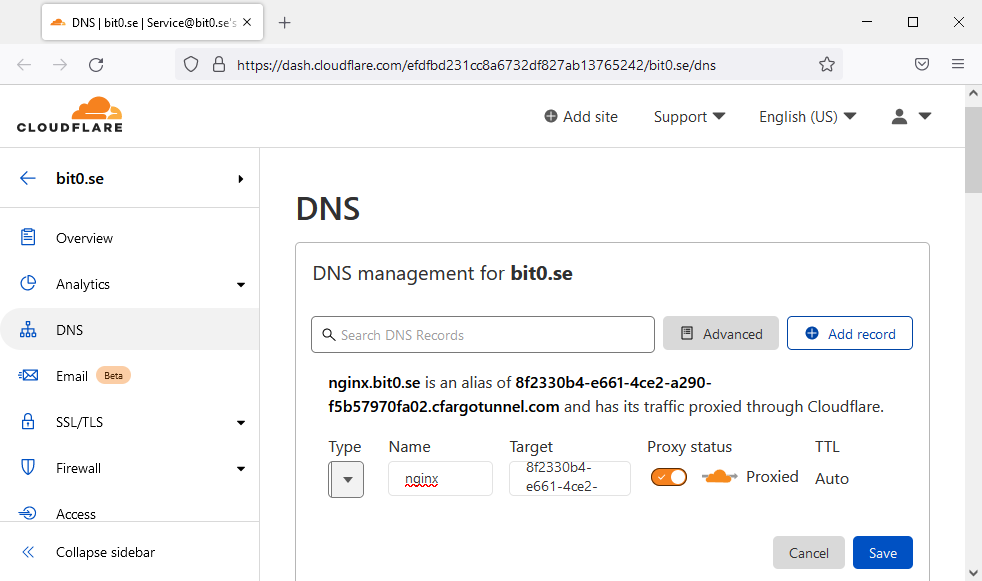
Running the tunnel
Final step is to activate the tunnel:
docker run --rm -it -v \workingfolder:/home/nonroot/.cloudflared cloudflare/cloudflared:2022.1.0 tunnel run <name>> docker run --rm -it -v W:\cf:/home/nonroot/.cloudflared cloudflare/cloudflared:2022.1.0 tunnel run example